

How To Clean And Seal An Old Deck
In this 2-office series, I testify how I stripped, cleaned, repaired, stained and sealed our old deck from start to stop for cheap! For Part 2 of the series, click here.
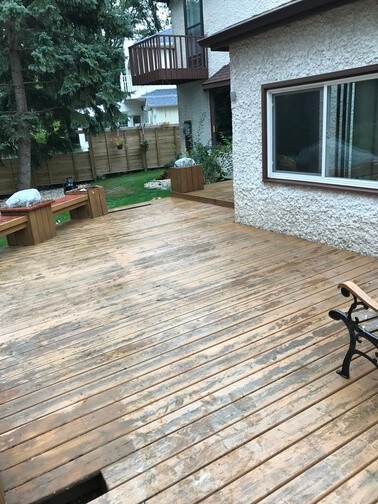
When we bought our house in the Spring of 2022, the stain on the deck was already flaking off and I knew I would accept to refinish it at some point. Fast forward a twelvemonth (2017), and there are now rotting boards on the deck floor and planters.
I was initially contemplating leaving the deck to weather as much as information technology would take to get the remaining stain off and relieve me the job of stripping if I chose to refinish it myself. Still, when I started to notice the rot and how fast information technology was spreading to other healthy boards, I decided to do something about it sooner than subsequently.
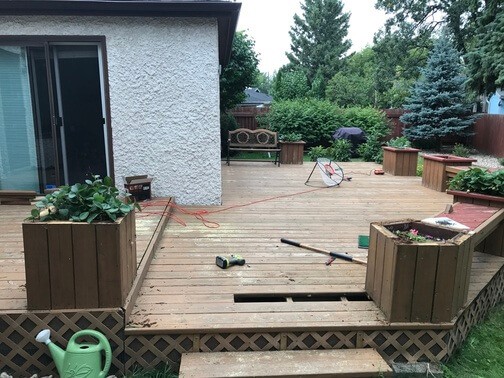
Inclusive of the surfaces of the planters, our deck measured approximately 500 sq. ft. A few quotes to get someone to come repair it showed that nosotros would exist needing anywhere from $1, 400 to just over $2,000! On average, we were going to spend at to the lowest degree $1,500 – We definitely could not afford to put upwards this much towards refinishing the deck!
At this point, I started looking closely at how I could go the deck refinished without breaking the bank. Post-obit some research online – Google and YouTube, I took some vacation time off work and embarked on my latest DIY project.
Solar day 1 – Remove Rotten Woods, Strip, and Clean
The weather was promising – cloudy day but warm enough to be comfortable working exterior.
Remove Damaged Woods
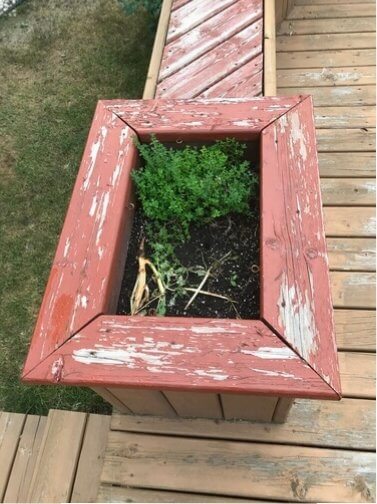
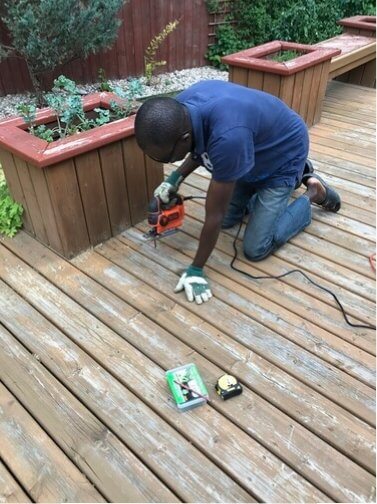
I got to piece of work and started removing and cut out rotten boards from the planters and deck floor. For replacement, I had obtained western cerise cedar for the deck floors and pressure-treated (PT) lumber for the planters. The idea behind this is I wanted to exist able to stain the floor decks immediately while leaving the planter replacements to weather over the wintertime and bound for staining sometime next year. The cedar was twice every bit expensive as the PT forest.
I fabricated the cuts required to replace the rotten woods and put them aside – my plan was to install them following stripping and cleaning. You can run across yours truly using the jigsaw like a pro beneath!
Stripping
For this task, I used the Behr Premium Wood Stain and Finish Stripper.
Before proceeding with stripping the deck, I wetted all surfaces with h2o including walls, doors, flowers and other vegetation in the surrounding area using a garden hose in other to prevent them from getting burned or getting discoloured. The stripper is a caustic chemical and y'all should habiliment appropriate safety gear for your feet, eyes, and nose as required.
The stripper has a thick mucilaginous consistency and cannot be applied using a sprayer. I applied it using the combination of a nap roller, roller frame and extension pole after pouring the stripper into a saucepan. I had to work fast as the surface must stay wet until you are done stripping.
After applying the stripping agent, instructions on the container is that you lot let it sit for 5 – 45 minutes before brushing. I was continuously misting with the garden hose and from nigh 25/30 minutes post-application started to brush off the stain, starting where the stripper was commencement applied.
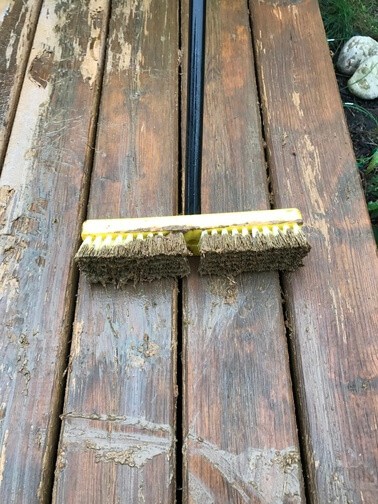
Yay! The old stain was coming off!
My excitement appeared to have been premature. Although the stain was coming off on the brush, it required a lot of elbow grease (tough physical attempt), and I knew right then – information technology was going to be a long mean solar day!
Stripping took me at least 3 hours of brushing, misting, brushing, misting, and on and on. The vertical surfaces were the most difficult or perchance they just had less stripping agent on them… I had almost run out of stripping agent when I got to apply information technology on the planters.
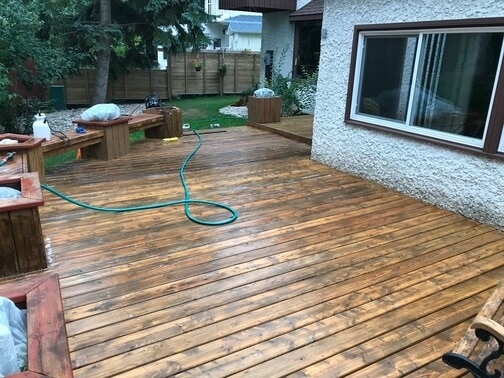
After doing all the brushing I could practise, I used the power wash at the lowest setting (the same setting I use when washing my motorcar) to rinse off the deck. From what I had read online, you tin can probably strip your deck using a ability washer and ditch the expensive stripper, however, you take chances doing serious damage to the wood – including carving, gouging, or just plain destroying the wood. I wanted to avoid whatsoever of these possibilities, and so I chose to become with depression pressure (approx 500 psi).
Cleaning
For this task, I utilized the Behr Premium All-in-one Wood Cleaner. The cleaner is required to neutralize the stripper and also get rid of mildew, algae, and fungus. It brightens the wood and returns it to its natural color.
Since the deck was already super-moisture, I didn't demand to wet it again. I practical the cleaner using a pump sprayer afterward diluting information technology ane:1 with water every bit per instructions. I let it sit down for a while, and and then once again – brush, brush, castor until it foams. The entire deck was then rinsed off with the garden hose.
It had been a long 24-hour interval, and after almost 12 hours of heavy labor, it was fourth dimension to pack information technology in for 24-hour interval ane.

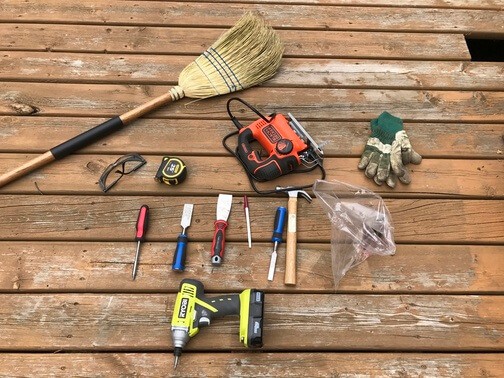
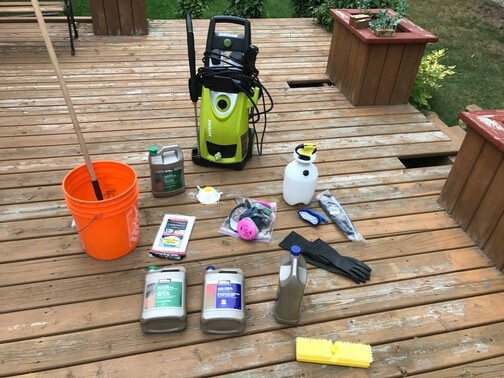
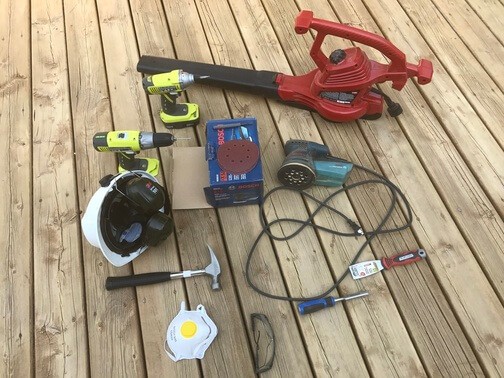
Materials and Tools used on Day 1 include: Jigsaw, impact driver and screwdriver, tape measure out, nose mask, eye goggles, gloves, nail gear up, pump sprayer, power wash, garden hose and sprayer, potent brush, cleaner and stripper, putty pocketknife, plastic drop cloth, decking screws, saucepan, broom, and new deck boards.
24-hour interval 2 – Sanding and Deck Board Replacement
Information technology's been ii full days since I stripped and cleaned the deck. The weather had been hot and the deck was sufficiently dry for sanding. As you may or may not imagine, I was yet feeling pretty worn out from all the scrubbing I did on Day ane. I couldn't afford to dwell on the pains and aches I was feeling, so I got to work.
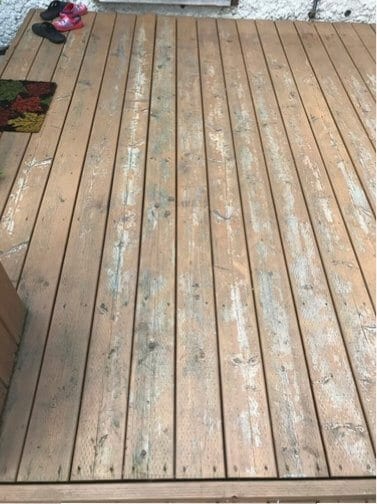
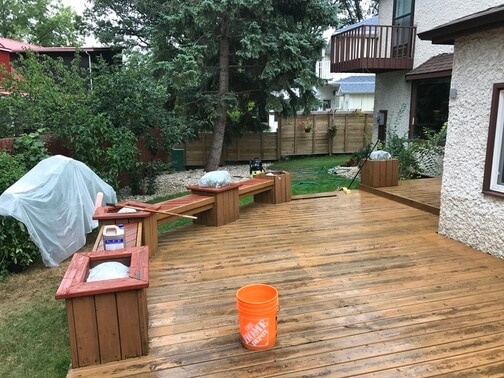
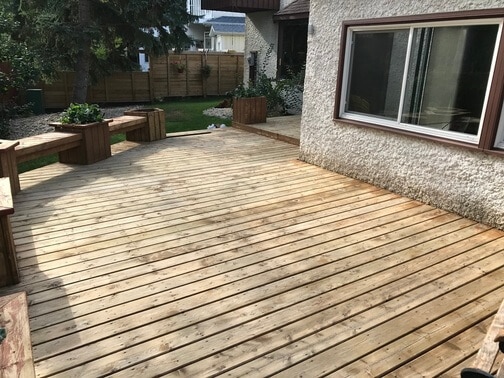
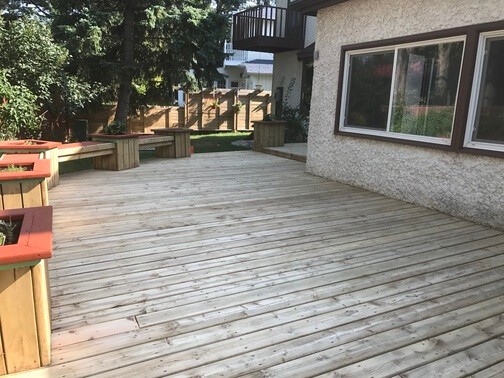
Below is a picture of the deck two days after it was stripped and cleaned. There were still some areas where the stubborn stain remains in place. I noticed these were areas that were usually protected from the elements – rain, dominicus, etc.
Sanding
My plan was to sand all individual boards on the deck and planter. I really wanted the stain to soak into the wood after I practical stain and sanding was great at getting the wood pores to open up. I needed to sand off all the stain I had failed to get off with the stripper and cleaner philharmonic. Sanding was also required to get rid of whatsoever raised wood fibre and smoothen the deck so nosotros could walk on it comfortably even when barefoot.
For this task, I had purchased a five″ orbital sander and tens of sanding discs with different grit sizes – forty, 60, and 80. I used a sanding grit of forty for those areas that yet had a heavy stain presence, and followed with a threescore grit to smooth. The deck boards were generally sanded using 60 grit and for the planters, I started with a 60 grit and finished with 80 grit sanding disc.
The sanding procedure took me several hours – nearly 7 hours of my life. I could have rushed it, but I wanted the finished product to look professional, and thus, put in the time.
After sanding, I used the leaf blower to blow off the resulting wood dust. This is important as stain volition non adhere well if y'all accept wood grit everywhere.
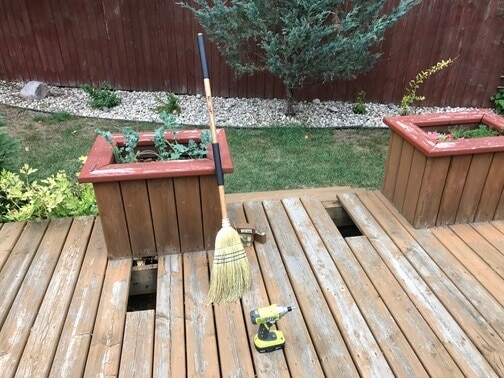
Board Replacement
Afterward sanding and blowing off the wood dust, I so proceeded to supersede the rotten forest I cut out on Twenty-four hour period 1.

Materials and tools used on Day 2 include : orbital sander, sanding discs, deck screws, leaf blower, impact drill and screwdriver, hammer, and painter's tape (I painted the cerise color portion on the planters).
Phew! Mean solar day two was long – almost 11 hours of grueling work! I figured information technology was fourth dimension to retire and rest for the long day ahead. The atmospheric condition had been great so far and my plan was to stain and seal the next solar day (Twenty-four hour period 3), starting at 6 a.m.

Keep to Office Two of the Series : How To Stain and Seal An Quondam Deck.
Besides Read:
- How to Stain and Seal an Old Deck
- FREE eBook: Simplified Guide To Ownership An Dwelling In Canada
- 4 Ways To Obtain A Gratis Credit Score In Canada

Source: https://www.savvynewcanadians.com/how-to-strip-clean-stain-and-seal-an-old-deck-part-1/
Posted by: ervinmargance.blogspot.com
0 Response to "How To Clean And Seal An Old Deck"
Post a Comment